Jan 30, 2014

Tango Mango Baby Quilt

Hello there!

Ok. Have you ever seen something that you thought... I NEED this...like now! And once you get it you think how could I live without it? That's what happened when I saw this mood Board from Studio Calico months ago. Second row, third image... the most beautiful Quilt I've ever seen! OMG I loooooooooove to have picnics and this quilt was a total crush.


So I went on hunting and I finally found it at an etsy shop called blueisbleu. The awesome thing about this is that they are totally handmade so I couldn't resist making me a super cool and unique Christmas present. It is perfect for those summer picnics wether you have babies or not and also for those winter indoor picnics as well, when there is nothing more than cold and rain outside. For me it is the perfect excuse to relax, grab a book and some sweets and lay down a bit.


xoxo

Boo

///////////////////////////////////////////////////////////////////

¡Hola! 

Vale. ¿Alguna vez has visto algo y pensaste... NECESITO esto... como sea?  ¿cómo he podido vivir sin ello? Eso es lo que me pasó cuando vi este Mood Board de Studio Calico de hace meses. Segunda fila, tercera imagen... y ahi teneís el edredón más bonito que he visto en mi vida! OMG Con lo que me gustan a mí los picnics y este edredón fue un flechazo. 

Así que me fui a la busca y caza del mismo y al final lo encontré en una tienda de etsy llamada blueisbleu. Lo más increíble es que son totalmente hechos a mano así que no pude resistir hacerme un superregalo único de Navidad. Es perfecto para esos picnics de verano tengas bebés o no, y también para los picnics de interior en invierno, cuando no hay nada más que frío y lluvia fuera. Para mí es la excusa perfecta para relajarse, coger un libro y algunos dulces y descansar un poco. 

xoxo

Boo

Jan 27, 2014

You can bring your own weather to a picnic (4th page with Copper Mountain Scrapbooking Main Kit)

Hello, 
Today I bring you, as I promised you, another project made with the SC Copper Mountain Scrapbooking Main kit only. I know it can be hard to believe because people normally accomplish no more than 3 projects per kit. But this kit was really inspiring and it has such a great variety of colors and designs and alphabets that I could play around for days. I love it and I can wait to get the SC Scrapbooking kit of February as I finally decided to become a subscriber for 6 months. Let's see how it turns out.


So, as I said before this is my fourth layout made with the January kit (you can see the previous projects in here). At this point, I already used most of the embellishments and papers so I decided to go with a very minimalist layouts in terms of paper as embellishments. I still had the woodgrain paper so I cut two stripes and then I cut each stripe in multiple triangles in order to make my background. Then I placed the photos on top and I chose my title. I grabbed the woodgrain vellum alphabet included in the kit as well to match the triangle banner. To finish the page I added some cute feathers cut from one of the papers, some labels, a badge and some other stamping.


And after seeing the four projects in overall, I think I killed the kit! Yes! So worthy! And the best thing is that I still have some leftovers to used in other pages. But I will combined them with other products from my stash as I don't think I have enough to complete another layout like this.


I hope you like all of them! And that the next month you get a kit you try to complete as much as pages as you can using only what it is included in the kit.


xoxo

Boo

/////////////////////////////////////////

Hola,
Hoy los traigo, como ya os prometí, otro proyecto realizado con el kit principal de scrapbooking de SC Copper Mountain. Sé que puede ser difícil de creer, ya que la gente normalmente logra un máximo de 3 proyectos por kit. Pero este kit resultó tener una gran variedad de colores y diseños y alfabetos con los que que pude jugar durante días. Me encanta y no puedo esperar a conseguir el kit SC Scrapbooking de febrero ya que finalmente me decidí a hacerme suscriptora durante 6 meses. Vamos a ver cómo resulta...

Así que, como he dicho antes este es mi cuarto diseño realizado con el kit de enero (podéis ver los proyectos anteriores aquí). En este punto, ya había usado la mayor parte de los adornos y papeles , así que decidí ir con un diseño muy minimalista en términos de papel como adornos. Todavía tenía el papel de tipo madera, así que corté dos tiras y luego corté cada una en varios triángulos con el fin de hacer mi fondo. Después coloque las fotos en la parte superior y elegí mi título. Cogí el alfabeto tipo madera, incluido en el kit, para que combinara con la franja de triángulos. Para terminar la página añadí algunas plumas cortadas de uno de los papeles, algunas etiquetas, una chapa y algún que otro sello.

Y ahora al ver los cuatro proyectos en general, creo que acabé con el kit! ¡Sí! Y lo mejor es que todavía tengo algunas sobras para usar ​​en otras páginas. Pero supongo que las combinaré con otros productos que ya tengo, ya que no creo que tenga suficiente para completar otro layout así.

¡Espero que os hayan gustado! Y que el próximo mes que recibáis un kit intentéis completar el máximo número de páginas usando sólo lo incluido en el kit. 

xoxo

Boo

Jan 23, 2014

Let's play with the Studio Calico Scrapbooking January Kit

Hello there,

Let's play Design team today... and what is that? Well, when you create layouts only with what you got in a kit, I call it this way. As it is exactly what the Design Team has to do when they receive a kit to promote it. I found this game pretty challenging sometimes. But at the same time it can be great to grow as a scrapbooker. It is also a good idea to avoid accumulating things that you actually buy but you don't end up using. If you challenge yourself to use only what it came on the kit I am sure you will end up using most of the items. Do you want to try?

This month I got the Studio Calico Scrapbooking January Kit (find it here). At this point I finished 3 layout working with only this material... and I have still plenty items to make one or two more layouts. Ok. I cheated a bit I used some Mr' Hueys...but hey! They are from Studio Calico as well and they are barely ever on a kit so hahaha that's good for me.


Layout #1: Celebrate Life


Layout #2: Labwork


Layout #3: I love navy


Do you spot every item from the kit? I hope so! Stay tuned 'cause next week I will so each layout more in detail.

xoxo

Boo


////////////////////////////////////////

Hola ,

¿Jugamos al equipo de diseño hoy?... y ¿qué es eso? Bueno, pues cuando se crean diseños sólo con lo que viene en un kit, yo lo llamo así. Ya que es exactamente lo que el equipo de diseño tiene que hacer cuando reciben un kit para su promoción. A veces este juego puede resultar bastante difícil. Pero, al mismo tiempo puede ser muy beneficioso para crecer como scrapbooker. También es una buena técnica para evitar la acumulación de cosas que se compran y que al final no se usan. Además así seguro que acabas usando la mayoría de los artículos en el kit. ¿Quieres probar?

Este mes me hice con el Kit de Studio Calico Scrapbooking enero (puedes encontrarlo aquí). Hasta este momento he terminado 3 layouts con sólo este material ... y aun tengo elementos suficientes para hacer uno o dos diseños más. Ok . Hice una pequeña trampa, utilicé un poco de Mr. Hueys... pero bueno son de Studio Calico así que... y ya que casi nunca vienen en un kit pues... jajaja a mí me vale.

¿Ya habeís encontrado todos los elementos del kit? ¡Espero que sí ! Estad atentos porque la semana que viene los enseñaré en más detalle.

xoxo

Boo

Jan 22, 2014

Counting Days (Biscuit Project DT)

Welcome again!

Today I am bringing you another beautiful project made with the January Scrap Non-Stop kit from Biscuit Project. I was captured by the wide variety of colors in the kit.


When I received the kit the first thing I did (well after jumping of happiness) was opening the vellum embellishment pack. As soon as they circle embellishments fell over the cardstock on a beautiful spread I knew i had to incorporate them in that way. So that is what I did!


To make it more dynamic I glued some stickers on top of them as speech bubbles and I also added my title and a few ampersands and stars.


To make the page more coherent I added a piece of cardstock at the bottom. The colors of that paper totally combine with the elements of the rest of the page. The only thing that I used which is not included in the kit was that little black label to write on my journaling.


And of course some rolling stamping which in fact you can buy at their shop.

See you soon!

xoxo

Boo

//////////////////////////////////////////////////////////////////

!Bienvenidos de nuevo!

Hoy os traigo otro genial proyecto hecho con el kit de Scrap Non-Stop de enero de Biscuit Proyecto. De nuevo, me encontré capturada por la gran variedad de colores en el kit.

Cuando recibí el kit de la primera cosa que hice (bueno después de saltar de la felicidad) fue abrir el paquete de adornos "vellum". Tan pronto como vi la forma que tomaron los adornos al caer todos juntos sobre la cartulina, se me ocurrió la idea de colocarlos de esa misma manera. ¡Así que eso es lo que hice!
Para hacerlo más dinámico pegué unas pegatinas en la parte superior de ellos en forma de burbujas de comic y también añadí mi título y algunas estrellas.
Para hacer la página más coherente añadí un pedazo de cartulina colorida en la parte inferior. Los colores de papel combinan perfectamente con los elementos del resto de la página. Lo único que he usado que no esta incluido en el kit, es ese pequeña tarjetita negra para escribir.
Y, por supuesto, algunos roller stamps los cuales, de hecho, puedes comprar en en su tienda.

¡Hasta pronto!

xoxo

Boo

Jan 20, 2014

I'm In Jot Magazine Issue 4

Oh Happy day!

I couldn't be more excited today because... some of my projects are published in the Jot Magazine Issue 4!! Yaaaaay!! Such a "I'm very proud of myself" moment. hehe Have you ever read this on-line Scrapbooking magazine? Maybe not as it is pretty new (they only have 3 previous issues) but since the first issue I fell trapped by their beautiful pages and now I am a regular reader of it. You can find lots of inspiration on their pages and the best thing is that it is completely free! wohooo!! So, I hope you head over their web site now to read their new issue (find it here). And don't forget to look for my 3 projects over the pages.


You can read more about my projects here, here, and here.

xoxo

Boo


////////////////////////////////////////////////////////////////////////////////

Feliz dia!

No podría estar más emocionada hoy, ya que... !algunos de mis proyectos han sido publicados en la edición 4 de la revista Jot Magazine! !Siiiiii! Hoy he tenido un momento de esos de "Estoy muy orgullosa de mí misma" jeje ¿Habeís leído alguna vez esta revista de Scrapbooking on-line? Quizás no, ya que es bastante nueva (sólo tienen 3 números anteriores), pero desde el principio me enganche y ahora soy una lector habitual de la misma. En ella podréis encontrar un montón de inspiración y lo mejor de todo es que es completamente gratis! wohooo! Por lo tanto, espero que os lancéis de cabeza a su web ahora para leer su nueva edición (podéis encontrarla aquí). Y no olvidéis buscar mis 3 proyectos en sus páginas. 

Para leer más acerca de mis proyectos podéis encontrar los post previos aquí, aquí, y aquí

xoxo 

Boo

Celebrate Life

Hey there,

Today I am excited to show you some of my first photos with my treasureeee, ups... I mean with my new camera. hahaha My family made me the best Christmas present: a Canon EOS 1100D Camera!! I looooove photography, I even took some photography courses during my exchange year in Texas, but I never expected a present as good as this. They totally reached and passed my expectations for a good Christmas present. I really appreciate it. Thanks!

Besides I'm still learning how to use it, and where to find my inspiration from... and which are the best light conditions, set-ups and all that, I love to take photos with the manual settings not just automatically. So, a few days ago I decided to challenge myself: I grabbed some confetti and started playing with different settings and locations at home. It was like trying to photograph kids or animals (always on the move). But in the end I think I achieved a few fun and beautiful photos to thank my family for this great present. They may be not perfect, or super sharp but they show who I am and how thankful I am so that's enough for me at this moment.

Everyday is a good day to celebrate life with some confetti. Who needs a better excuse right?

xoxo

Boo


////////////////////////////////////////////////////////////////////////////////////

Hola,

Hoy estoy super emocionada de mostrar algunas de mis primeras fotos con mi tesoroooo, ups... quiero decir con mi nueva cámara. jajaha Mi familia me hizo el mejor regalo estas Navidades: una cámara Canon EOS 1100D. Siempre me ha gustado la fotografía, incluso tomé algunos cursos de fotografía durante mi año de intercambio en Texas, pero nunca me hubiera esperado un regalo así.  Alcanzaron y pasaron de largo totalmente mis expectativas de un buen regalo de Navidad. No sabéis como se lo agradezco. ¡Gracias!

Aunque todavía estoy aprendiendo a usarla, a saber dónde encontrar mi inspiración y cuáles son las mejores condiciones de luz, montajes y todo eso, me encanta tomar fotografías con los ajustes manuales no solo de forma automática. Así que, hace unos días me desafié a mí misma: cogí un poco de confeti y empecé a jugar con diferentes configuraciones y ubicaciones. Fue igual de difícil como tratar de fotografiar a niños o animales (siempre en movimiento). Pero al final creo que conseguí algunas fotos divertidas y monas para  agradecer a mi familia por este gran regalo. No son perfectas, o súper nítidas pero muestran cómo soy y lo agradecida que estoy y eso es suficiente para mí en este momento .

Cada día es un buen día para celebrar la vida con un poco de confeti. ¿Quién necesita una excusa mejor ¿no?

xoxo

Boo

Jan 15, 2014

be pretty

(texto en español al final de la entrada)

Hello fellows,

I hope you enjoyed my last post with the step by step tutorial (find it here). Because today I am sharing a page that I made following the same idea, techniques and embellishments but with a different meaning. I know that both of them (specially this one) has a spring feeling, but I just can't wait for spring to come! :) Too early to say that? Hope not!


For this page instead of using a triangle mask made by myself, I used a chevron mask by Studio Calico. Using the same technique (molding paste + white acrylic paint) I created this tone on tone effect.


I paint my tittle with the same nail polish. In fact it is the same one that I am using on the photos. I like the different effect of the Mr Huey's splashes on the cardstock and on the molding paste.


As you have may already noticed, for this page I used more girlie elements in comparison with the previous one. I had that flower sticker on my stash for ever, but I finally find the perfect spot to use it. Again I added the cute pastel colored feathers and some little wood pieces.


Have you spotted that corner on top? For me is the little details which makes the perfect page.

xoxo

Boo

/////////////////////////////////////////////

Hola a todos,

Espero que hayáis disfrutado mi último post con el tutorial paso a paso (podéis encontrarlo aquí ) porque hoy quiero compartir esta página que hice siguiendo la misma idea, las mismas técnicas y los adornos de la misma colección, pero con un significado diferente. Sé que ambos (especialmente éste) tiene una sensación primaveral, pero es que simplemente ¡¡¡no puedo esperar a la primavera ya!!! :) ¿Es muy pronto para decir eso? ¡Espero que no!

Para esta página en lugar de utilizar una máscara con forma de triángulo hecha por mí, he usado una máscara "chevron" de Studio Calico. Utilizando la misma técnica (pasta de moldeo + pintura acrílica blanca ) he creado este fondo con el efecto sobre tono .
De nuevo el titulo está pintado con el mismo esmalte de uñas. De hecho, es el mismo que llevo puesto en las fotos. Me gusta el diferente resultado de las salpicaduras de la tinta Mr. Huey sobre la cartulina y sobre la pasta de moldeo. ¿Os habéis fijado?
Como ya os habréis percatado, para esta página utilicé elementos más femeninos en comparación con el anterior. Esa pegatina gigante de flores de Dear Lizzy ha estado sobre mi mesa tiempo y tiempo pero al final me decidí a usarla en esta página y me parece el lugar perfecto para usarlo. Una vez más he añadido las plumas de color pastel  y algunas pequeñas piezas de madera.
¿Te has fijado en esa esquina en la parte superior ? Para mí son los pequeños detalles los que hacen que la página sea perfecta.

xoxo

Boo

Jan 13, 2014

be true. (step by step tutorial)

(texto en español al final de la entrada)

Happy Monday!

I hope you are all having a great start of the year. I can't believe it is again January. Where did the last year go?And what about your new year's resolutions? Already on the trash? Hope not!! hehe As always my main scrapbooking resolutions are try new things and share more of my work. So, today I am sharing this beautiful page (as part as my resolution checklist) that I made with my all time favorite line: 5th and Frolic from Dear Lizzy. Ok. It may be not a new thing but who doesn't have a special line which can resist using it again and again? I bet we all have one. So this is the page:


Step 1: I started creating the background by using a triangle piece of cardstock as a mask. I cut out a triangle from the pattern paper (from the same collection) and then I used it to make a stencil on a white piece of cardstock. With this technique you really can use any form or pattern that you can imagine.


Step 2: Then, I used this as a mask to paint triangles all over the page. To make them pop (dimensional) I mixed some white acrylic paint and molding paste and then I applied the mix with a brush. Once it dries you achieve, with this tone on tone technique, a beautiful texture.


Step 3: Ok. So now that the background is ready I grabbed the rest of the elements that I wanted to incorporate on my page: a photo, some pieces of pattern paper, wood veneers, stickers and of course a roller stamp.


Step 4: The next step would be to decide where to place the photo and then adding the papers as layers behind it. Some tricks: you can use pop dots to create more dimension and also you can place a glassine bag between the papers to make them pop (that is what I did here).


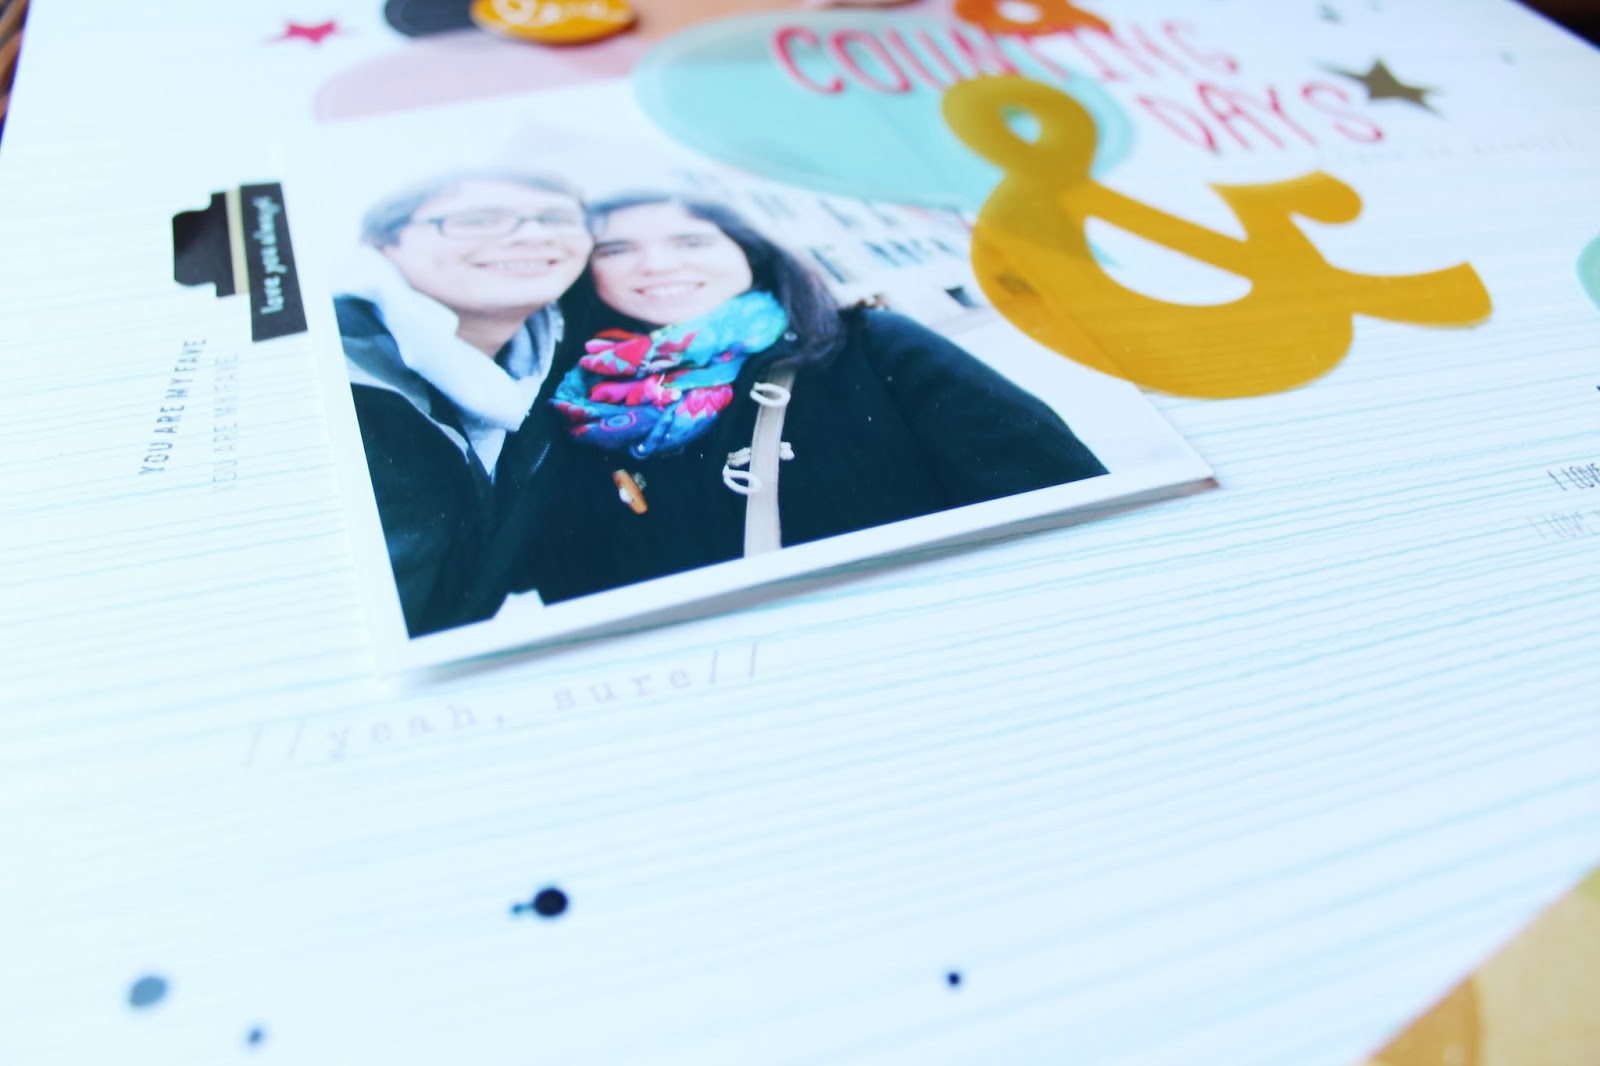
Step 5: To complete the page I added here and there some embellishments such as that cute little cloth pin, the feathers or the fox sticker. To finish the page, I painted my title and sprayed some Mr Huey's splashes. In case you were wondering, I painted my title with nail polish that is why it looks so much brighter!


Done. Easy right? Here I leave you some detail shots of the page.


xoxo

Boo

/////////////////////////////////////////////////////////////////////////////////////////////////////////////////////////////////////////////////////////

¡Feliz Lunes! 

Espero que todos estéis teniendo un gran comienzo de año. No puedo creer sea otra vez Enero. ¿Adónde se fue el año pasado? ¿Ya tenéis propósitos de año nuevo? ¿O acabaron ya en la basura? ¡Espero que no! jeje Como siempre mis principales propósitos de scrapbooking vuelven a ser probar cosas nuevas y compartir más de mi trabajo. Por lo tanto, hoy os quería enseñar esta página (como parte de mi lista de propósitos) que hice con mi colección favorita de siempre: 5th and Frolic de DearLizzy . Vale. Puede que eso no sea algo nuevo, pero ¿quien no tiene una colección favorita a la que no puede resistirse a usar una y otra vez ? Apuesto a que todos tenemos una. Así que esta es la página.

Paso 1: Empecé por crear mi fondo utilizando una pieza de cartulina en forma de triángulo como máscara. La obtuve cortando un triángulo desde uno de los papeles de la misma colección y la usé para hacer una máscara en un pedazo blanco de cartulina. Con esta técnica se puede utilizar realmente cualquier forma o patrón que uno pueda imaginar.
Paso 2: Después, empleé esto como una máscara para pintar triángulos por toda la página. Para que tuvieran cierto volumen mezclé un poco de pintura acrílica blanca y pasta moldeable y luego apliqué la mezcla con un pincel. Una vez seca queda una textura super bonita con esta técnica de tono sobre tono.
Paso 3: El fondo está listo. Ahora toca elegir el resto de elementos que quería incorporar en mi página. Mi foto, algunos trozos de papel, las formas de madera, pegatinas, y por supuesto, un sello de rodillo.
Paso 4: El siguiente paso sería decidir dónde colocar mi foto. Y a continuación, añadir los papeles formando capas detrás de la foto.
Algunos trucos: se puede utilizar taquitos dimensionales para crear más dimensión y también se puede colocar una bolsa de papel o glassine entre los papeles para que haya más dimensión (Eso es lo que hice aquí).
Paso 5: Para completar la página añadí aquí y allá algunos adornos como ese pequeña pinza , las plumas color pastel o la pegatina de zorro. Para terminar, añadí mi título y salpicaduras de Mr Huey. Si os estáis preguntando con que pinté mi título, pues os lo dire: con esmalte de uñas para que fuera mucho más brillante. jeje

Hecho. Fácil ¿no? Aquí os dejo algunas fotos de detalle de la página.

xoxo

Boo

Jan 9, 2014

Oh Christmas Tree

(texto en español al final de la entrada)

Hello,

This is my favorite layout from these Christmas. It may be not my favorite because the story that it tells but because how it turned out. I love the minimalist, bright and brilliant look!


For this page I used some cute wood Christmas trees that I found on a retail shop in my hometown(the name of the shop is Casa). I used the whole package which was around 3 euros more or less and they are a little bit bigger and thicker than the SC wood veneers.


I placed them making the shape of a bigger tree and then I glued them down. On top of them I added my photo with a back paper and a couple of enamel dots and a tag.


I added a pop of red with my title down the tree. Of course a Christmas tree it is not completed without a star on top, right? Just a gold star paper clip would be the perfect match for that. To make it more coherent, I added a pop of gold with some gold rubb-ons.  Easy but pretty!


xoxo

Boo

///////////////////////////////////////////////////////////////////////////////////////////////////////////////////////////////////////////////////////////////////

Hola,

Os presento mi layout preferido de estas navidades, tal vez no sea mi preferido por la historia que narra, sino por como quedó la pagina. ¡Me encanta el aspecto minimalista, luminoso y brillante!

Para esta página usé unos monisimos arbolitos de madera de navidad que encontré en una tienda en mi ciudad llamada Casa. Empleé todo el paquete, que costaba alrededor de 3 euros más o menos y los arbolitos son un poco más grandes y más gruesos que las chapas de madera SC a las que estoy acostumbrada. 
Los dispuse haciendo la forma de un árbol grande y una vez que estuve contenta con ello los pegué al papel. En la parte superior de ellos he añadido mi foto con un papel en la espalda con un par de pegatinas y una tarjeta.
Para añadir un toque rojo típico navideño, he añadido un título en rojo bajo el árbol. Por supuesto, un árbol de Navidad no está completo sin una estrella en la parte superior, ¿verdad? Un clip de papel en forma de estrella dorada resultó ser perfecto para esto. Para hacerlo más coherente, he añadido un toque dorado con algunos Rubb-ons en forma de estrella también. Fácil, pero bonito.

xoxo

Boo

Jan 6, 2014

1st XMAS

(entrada en español más abajo)

Good Morning,

This week I' ll be sharing a few of my favorite Christmas layouts. I didn't have enough time to complete a whole December Daily but at least I had the chance to scrap the most important moments of it.

So the first layout is focused on my niece's first Christmas. We were all excited about this although she is still too young to remember it. So I took a photo with her first Christmas present and I decided to make a layout inspired by Paige Taylor Evans layouts.


First, I cut out the letters from the white cardstock. I use some alphabet thickers to mark my tittle with a pencil and then I used a pair of scissors. Then I placed another piece of cardstock behind and I started placing red buttons and snowflake shaped wood veneers. It was my fist time using this technique and I really like the result although I think I can upgraded it the next time.


Apart from some snowflakes, I didn't wanted to use a lot of Christmassy elements because I think that sometimes it can get too saturated. So instead, I focused on using a red and woodgrain style to make my page.


Have I mentioned before how much I love using roller stamps? I think so, maybe a thousand times, right? hahaha In this page I used my AC Xmas roller stamp. It has the cutest phrases to add the date with some cute details.


I hope you had a beautiful Christmas!!

xoxo

Boo

///////////////////////////////////////////////////////////////////////////////////////////////////////////////////////////////////////////////////////////////////

Buenos días,

Esta semana compartiré algunas de mis paginas favoritas dedicadas a estas Navidades. Aunque me hubiera encantado, estas Navidades no he tenido tiempo suficiente para completar un diario de todo diciembre, pero al menos he tenido la oportunidad de scrapear los momentos más importantes.

Así pues, el primer diseño se centra en la primera Navidad de mi sobrina. Todos estábamos entusiasmados con ello a pesar de que sabíamos que todavía es demasiado pequeña para recordarlo. Tomé una foto con su primer regalo de Navidad y me decidí a hacer un diseño inspirado en las paginas de Paige Taylor Evans.
Primero, corté las letras de la cartulina blanca. Para ello use algunas letras de un alfabeto para marcar con lápiz mi titulo y después lo recorte con un par de tijeras. Después puse otro pedazo de cartulina detrás y empecé a colocar los botones rojos y las maderitas con forma de copo de nieve. La verdad ha sido la primera vez que he empleado esta técnica y me gusta mucho el resultado, aunque creo que puedo mejorarla para la próxima vez.
Aparte de algunos copos de nieve, no he querido utilizar una gran cantidad de elementos Navideños ya que para mi gusto, suele tender a quedar demasiado saturado. Así que en vez de eso, me he centrado en el uso del color rojo y vetas de la madera para hacer mi página.
¿He mencionado antes lo mucho que me encanta usar sellos de rodillos? Creo que sí, tal vez miles de veces, ¿no? jajaja En esta página he usado mi sello rodillo AC Navideño. Tiene las frases más monas para agregar la fecha con algunos detalles.

¡Espero que hayáis disfrutado de una Navidad inmejorable!

xoxo

Boo

Jan 3, 2014

Design Team (Biscuit Project DT)

(texto en español al final de la entrada)

Good Morning!

This is my very first post for Biscuit Project as part as its Design Team. So, to celebrate this moment, as it is also my first time as a member of a Design Team, I bring you this special page for me. To make this page I was inspired by this month's sketch by Biscuit Project (see the full post in their website here). And what did I used to create it? Well, I simply used the Biscuit Project January Scrap Non-stop kit (find it here). Here you have a peek on their awesome kit and you can find the sketch down as well.


So this is my approach:


I love love love the beautiful colors of this kit which is mainly composed by the Printshop collection by Studio Calico. I decided to go with a super girlie combo using the pinks, oranges and yellows of the kit.


That HappyMail stamp is just the cutest thing ever!! And with all the pen pals that I have and Christmas Cards that I wrote these days I really have already given it a really good use! The embellishment pack and the stickers / alphabet pack combine really well together and they allow you to create this complete pattern of elements.


The kit really has everything you need to create a beautiful page. The mini badges are just a plus to add the perfect touch and some dimension to your page.


I combined that bright colors with some black and white elements to add a bit of drama to the page. In fact, those splashes are blue but if you apply the spray really thick it seems like black! Great, two color in one spray ;)

xoxo

Boo

///////////////////////////////////////////////////////////////////////////////////////////////////////////////////////////////////////////////////////////////////

¡Buenos días!

Este es mi primer post para Biscuit Proyect como parte de su equipo de diseño. Así que, para celebrar este momento, ya que también es mi primera vez como miembro de un equipo de diseño, os traigo esta página tan especial para mí. Para que crear esta página me inspiré en el boceto de este mes de Biscuit Proyect (podeís encontrar su post aquí). ¿Y qué he usado para crearlo ? Bueno, pues por supuesto  sólo utilicé el Scrap Non- Stop kit de Biscuit Proyect de Enero. Aquí podéis echar un vistazo a su impresionante kit y el boceto a continuación. 

¡¡Me encanta los colores vivos de este kit compuesto principalmente por la colección Printshop de Studio Calico. Me decidí a usar  un combo súper "girlie" utilizando las rosas, naranjas y amarillos del kit.

¡El sello happymail es super chulo e imprescindible! Y con todos los amigos por correspondencia y tarjetas de Navidad que he escrito en estos días  realmente ya  le he dado un muy buen uso jaja El pack deadornos y el paquete de pegatinas / alfabeto combinan muy bien juntos y permite crear este una infinidad de combinaciones.
El kit realmente tiene todo lo necesario para crear una página increible. Las mini chapas son el toque perfecto y ayudan a dar dimensión a la página.
Combiné además los colores brillantes con algunos elementos en blanco y negro para añadir un poco de drama. De hecho, esas manchas son de color azul, pero si aplicas el spray muy espeso parece como si fuera negro. ¡Genial! Dos colores en un mismo spray ;)

xoxo

Boo

Jan 2, 2014

I love you more than ice cream

(texto en español al final de la entrada)

Merry Christmas and Happy New Year!

I know it has been a while since my last post but I got busier and busier during these weeks. You know how busy can the Holiday season get (too much excitement with the decoration, seeing all your family and friends, and buying a pile of presents for everyone) and also with all the things going on at my lab (experiments, conferences and trips to Germany),. But I think I am ready to start with a series of post s that I edited this past weekend.

So, today I wanted to share with you this simple layout that a made a few weeks ago with a bunch of leftovers from other projects.


For the background I used a leftover piece of fabric which had a huge hole in the middle. To cover it I placed on top two pieces of plain cardstock from a Studio Calico Card kit that I bought some while ago.


Then, I started playing with bits of paper, and when I finished,  I placed my photo on top of it. I couldn't resist adding that cute little camera clip. Isn't it the cutest clip ever? Some velum embellishments and wood veneers completed the right side of the photo.


I also used some mint feathers and enamel dots on the left top corner of the photo. The red-pink washi tape gives a pop of color to the whole mint-beige page. I also added some red-pink enamel dots on the opposite side of the page to make it more coherent.


I finished the page by first adding the title right on top of the fabric (decorated with a mint folded ribbon); and second, by writing my journaling next to the photo.

Simple, right?

xoxo

Boo

///////////////////////////////////////////////////////////////////////////////////////////////////////////////////////////////////////////////////////////////
Hola!

Ultimamente he estado muy ocupada debido a todo los experimentos que tengo que llevar a cabo estos días en el laboratorio, conferencias y viajes a Alemania por trabajo, a parte de todo lo que conlleva por si estas fechas: que si la decoración, que si las comidas o cafés con la familia y los amigos, que si las compras de los regalos para el Olentzero y los Reyes...., buff Pero creo poco a poco iré retomando el ritmo y os iré presentado unos post en los que he estado trabajando este último fin de semana. 

Así que, hoy quería enseñaos este layout que hice hace unas semanas con material que me había sobrado de unos proyectos anteriores.

Para la base he empleado una tela que tenía un agujero en medio. Así que lo he cubierto con dos cartulinas lisas que tenía de un Card kit de Studio Calico de hace algún tiempo (me lo compre por los sellos por eso no había ni usado las cartulinas jeje)

Después empece a jugar con diferentes trozo de papel que me habían sobrado, y coloqué mi fotografía encima. No pude resistirme a utilizar ese clip con forma de cámara. ¿No es el clip más mono del mundo? En el lado derecho de la foto también añadí unas formas de papel de cebolla y unos wood venners. Para completar el lado izquierdo, empleé unas plumas también de color mint y unos enamel dots.

The red-pink washi tape gives a pop of color to the whole mint-beige page. I also added some red-pink enamel dots on the opposite side of the page to make it more coherent.
I finished the page by first adding the title right on top of the fabric (decorated with a mint folded ribbon); and second by writing my journaling next to the photo.

Simple, ¿verdad?

xoxo

Boo