Mar 31, 2014

xoxo

Happy Last Day of March!!!

I am so ready for this month to end. Don't get me wrong, I had a wonderful month. I started March in Mexico, two weeks ago I went for a weekend to Madrid with the whole family and this past weekend my friends and I went to an old house in the middle of nowhere to have fun nights chatting, drinking chocolate milk and playing Cluedo. Classic!

I am still scrapping photos of our trip to Mexico as we took some beautiful photos with such a nice weather (lucky me). I also have some leftovers from a few Studio Calico kits and the new collection from Dear Lizzy which by the way I LOVE. 


As you may already know, I am a huge lover of the Dear Lizzy Collections by American Crafts and Elizabeth Kartchner. I am also a huge fun of her style, so fun, cheerful and full of inspiring ideas. In fact, this page is inspired onone of her latest projects for Studio Calico. 


So, I based my page on the main elements from her page and then I started to just follow whatever came to my mind. It can be always fun to got inspired by others' pages but remember to stay true to your style and not to make just a replica of their work. 


What I love the most about the composition of the page was those plus signs on the left side. Some time ago I made something similar with triangles. It was really fun!! And now that I tried the plus signs I am already thinking of the next shape I will want to use!


xoxo

Boo

P.S. Next May I will attend to the 6th Anniversary of Kits de Somni which consists of a weekend full of workshops (find more info here). And... Elizabeth Kartchner and Janna Werner will be the awesome teachers of these workshops!!!  Yaaaaaay!!!!! I am pretty excited about this weekend, can't wait for it to arrive. It will be also the first workshop I attend and having these awesome host/teachers will make it even more awesome!! ;)


///////////////////////////////////

¡Feliz último día de marzo!

Estoy lista para que este mes llegue a su fin. No me malinterpreteís, no es que haya tenido un mes, todo lo contrario ha sido un mes maravilloso. Empecé marzo en México, hace dos semanas me fui para un fin de semana a Madrid con toda la familia y este fin de semana pasado mis amigas y yo fuimos a una vieja casa en medio de la nada a pasar unas noches de diversión charlando, bebiendo leche con chocolate y jugando a Cluedo. ¡Un clásico!

Todavía estoy scrapeando fotos de nuestro viaje a México, ya que tomamos muchas fotos super bonitas y con buen tiempo. También me quedan algunas cosas de algunos kits de Studio Calico y la nueva colección de Dear Lizzy, que por cierto ME ENCANTA.

Como ya sabéis, me encantan las colecciones de Dear Lizzy de American Crafts y Elizabeth Kartchner. También soy una gran enamorada de su estilo tan divertido, alegre y lleno de ideas inspiradoras. De hecho, esta página está inspirado de uno de sus últimos proyectos para Studio Calico.

He basado mi página en los principales elementos de su layout y luego segui creando con lo que me venía en mente. Puede resultar muy divertido inspirarse en páginas de otros pero recordar ser siempre fieles a vuestro estilo y no hacer simplemente una réplica de su trabajo.

Lo que más me gusta de la composición de la página fueron esos cruces en el lado izquierdo. Hace algún tiempo hice algo similar con triángulos. ¡Fue muy divertido! Y ahora que he probado con cruces ya estoy pensando en la siguiente forma voy a querer usar!

xoxo

Boo

P.D. Este próximo mes de mayo voy a asistir al sexto aniversario de Kits de Somni que consiste en un fin de semana lleno de talleres (podeís encontrar más información aquí). Y ... ¡Elizabeth Kartchner y Janna Werner serán las impresionantes profesoras de estos talleres! ¡¡¡Siiiiiiiii!!! Estoy muy emocionada con este fin de semana, no puedo esperar a que llegue . Será también el primer taller al que asisto y tener estas anfitriones/ profesoras increíbles hará que sea aún más perfecto ;)

Mar 27, 2014

Wanderlust

Hello scrappers,

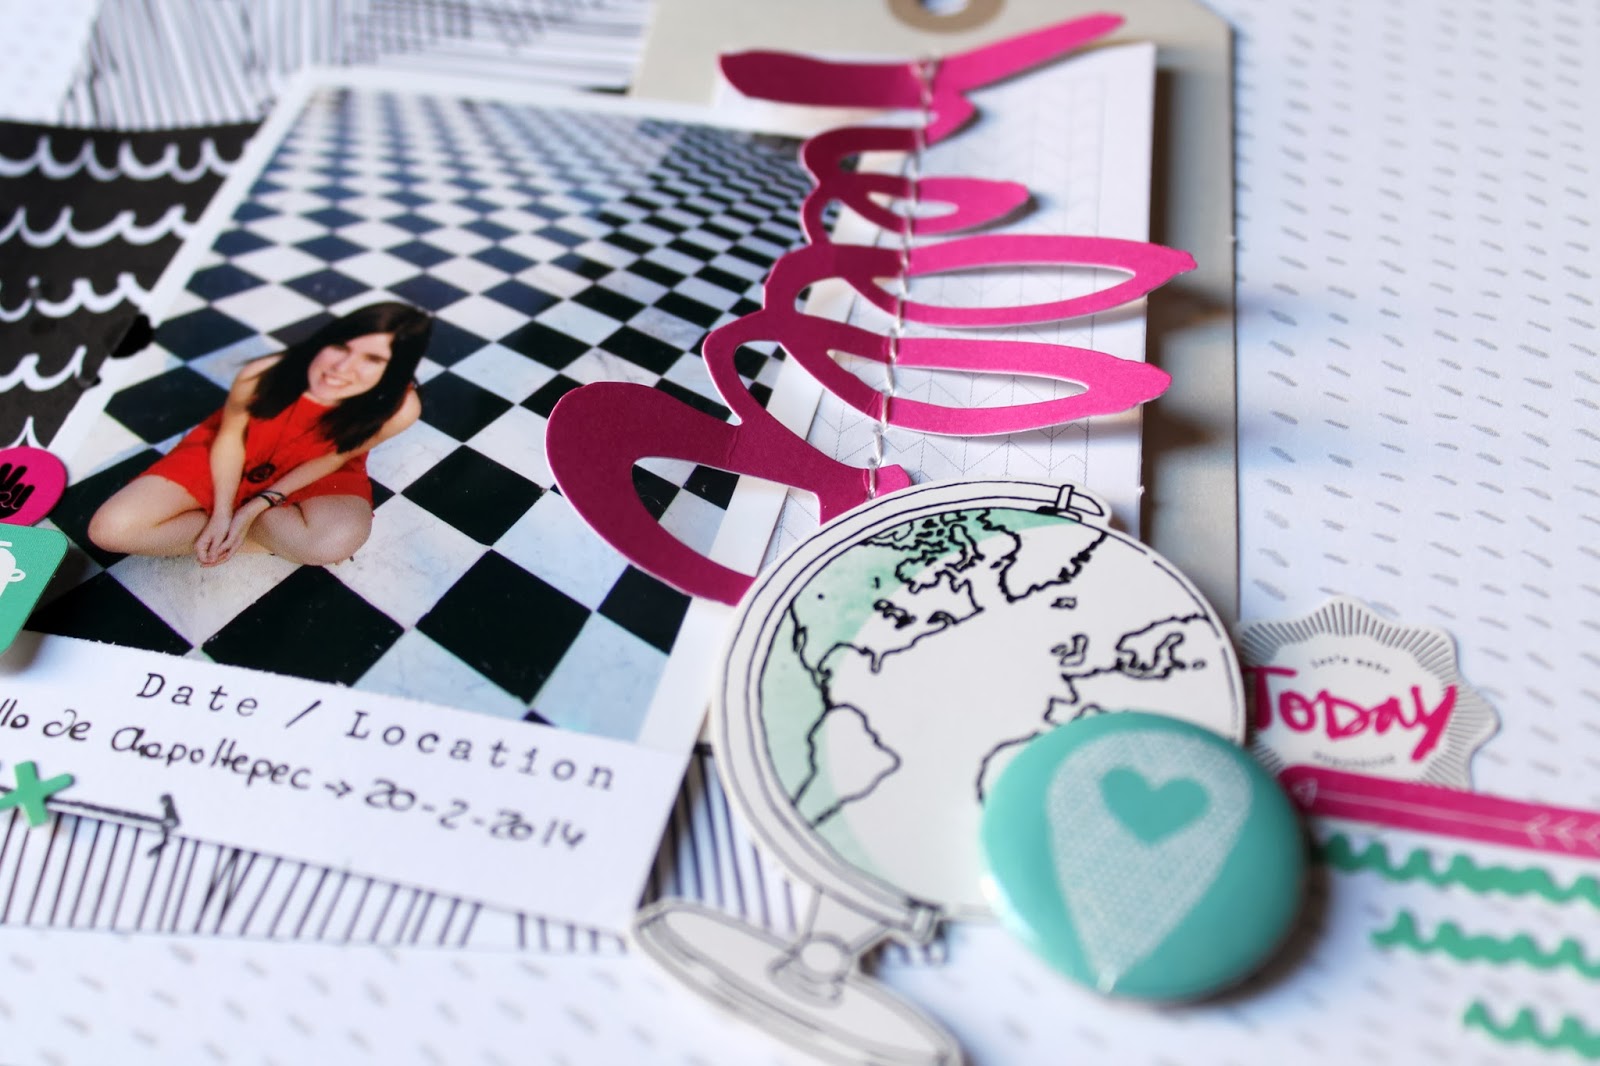
It is time to share another travel focused page. I wanted to tried something different with this one so I challenged myself to mix and match different techniques that I do not really use very often but that I definitely should have to use more often.


I am talking about brush scripting and stitching. I love both techniques and I love what other people do with them but I don't know why they are something that I am not that into, I guess.So to push me onto using these techniques, I started by graving one the Amy Tangerine Plus One stitching tags (the one with the feather). They come with pre made holes. So you just have to follow the path and you will have an amazing texturized tag. Very simple! 

After that I placed my photo and the tiny elements around it. I also used rub-ons, which is, once again, something that I do not use very often but I love! I guess, the reason behind this, is that I tend to hoard rub-ons... they are so pretty that I do not want to used them and I want to keep them forever in its cute packaging!!! But I have decided to start using them until I empty the packages.


Finally on the bottom side of the page I painted my title. I was so nervous because it was going to be a huge title and if I mess it that It was going to be a huge title to cover up as I didn't have another paper like that. If you want to try this and you are not felling very confident, try to make it at first on a white cardstock. In this manner if you mess up you can try it all over again on another white cardstock. I was inspired by the name of one of the latest collections by Studio Calico. I love the logo and I tried to make something like that with black ink.


xoxo

Boo


///////////////////////////////

Hola scrapeadoras,

Es el momento de compartir otra página de viajes. Quería algo diferente para esta, así que me decidí a mezclar y combinar diferentes técnicas que realmente no utilizo muy a menudo, pero que definitivamente debería acostumbrar a emplear más.

Estoy hablando de la escritura con pincel y la costura. Me encantan las dos técnicas y me encanta lo que otras personas hacen con eso, pero no sé por qué son algo que nunca tiendo a usar.

Así que para empujarme hacia el uso de estas técnicas, empecé por coger una de las etiquetas de costura de Amy Tangerine Plus One (la que tiene una pluma). Estas ya viene con los agujeros hechos, por lo que sólo hay que seguir el camino y así obtendrás una etiqueta texturizada increíble. ¡Muy simple!

Después de eso coloqué mi foto y los pequeños elementos que lo rodean. También usé rub -ons , que es de nuevo, algo que no suelo utilizar a menudo, pero que me encanta! La razón supongo es que tiendo a acumularlos... ¡es que son tan bonitos que no quiero usarlos y me los quiero quedar para siempre ahí tan monos en su paquete! Pero he decidido empezar a usarlos hasta vaciar los envases.

Por último en la parte inferior de la página pinté mi título. Estaba tan nerviosa... por que si la pifiaba... no tenía más papeles de esos para volver a empezar e iba a ser un gran título difícil de tapar en caso de necesidad jeje. Si te animas a probar algo así yo te recomendaría empezar por hacerlo sobre cartulina blanca de esa que siempre tenemos un montón para volver a empezar si nos equivocamos. Para el título, me inspiré en el nombre de una de las últimas colecciones de Studio Calico. Me encanta el logotipo y traté de hacer algo así con tinta negra.

xoxo

Boo

Mar 24, 2014

Silly faces (2 pages)

Happy Monday!

How is Spring treating you already? Here in Bilbao it is still difficult to tell if we are already in Spring or still in Winter. But looking to the calendar makes me so very happy because the Summer is getting closer and closer. Hooray!! 

Anyways, today I am here with two new pages that I made recently. I love to make silly faces (so does my boyfriend) and I love to scrap those photos because they are fun, innocent, sometimes super freak but for me the most important thing is that they kind of show how truly a person is. It may sound ridiculous, right? But I don't know I like to document those kind of moments.


So for the first page I chose a few photos of me and I decided to make a 3x3 grid design with them. But instead of using 9 photos I took only 6 of them and I filled the gaps with stamping. I should have done this with gold embossing to make it pop a little bit more. But I just recently got my embossing gun (another birthday present) so I couldn't try this when I made this page but I will remember that for the next time. 

The stamps are from the incredible Lindsay Letters. A friend of mine bought them for me in the States and send them to me here in Spain as they do not ship internationally. Pity! They are gorgeous and they added one extra stamp for free as well! Lucky me! I completed the page with leftovers from the Sugar Rush kits by Studio Calico and  a couple of things from my stash like the star wood veneer or the camera stamp by Amy Tangerine.


Once again I mainly used mint/aqua gold/kraft and white color for this page. I am REALLY enjoying this color combo seriously!! But this time I decided to add a pop of yellow and red as well to make it more girlie.


Keeping in mind the same idea and techniques and the color combo, I created the second page. A while ago I created another kind of male page (find it in here). A lot of people told that they love it as sometimes it can get a little bit difficult to find a male page out there.


So I decided to star this one the same way as the other time, with a black and white background. I don't mean that to make a boys page you have to use black. But I don't know as I normally create very colorful pages and using black becomes always a challenge as well, I tend to mix both challenges as the same time.  

Then, I placed the photos of my boyfriend making silly faces and after that I added mint/aqua, kraft and white elements. I love how the vibrant colors contrast with the dark cardstock.


I also tried to use some leftovers from the March kit by Biscuit Project and the Sugar Rush kits again. I just played with them and try different arrangements until I found the perfect one for me.


xoxo

Boo

/////////////////////////////

¡Feliz Lunes!

¿Cómo os está tratando la primavera? Aquí en Bilbao todavía es difícil saber si ya estamos en primavera o aún en invierno. Pero mirar el calendario me pone muy feliz porque el verano está cada día más y mas cerca. ¡Siiiii!

De todas formas, hoy estoy aquí con dos nuevas páginas que hice recientemente. Me encanta hacer muecas (cosa que le encanta también a mi novio) y me encanta escrapear esas fotos porque son divertidas, inocentes, a veces super frikis pero para mí lo más importante es que muestran cómo verdaderamente es una persona. Puede sonar ridículo, ¿verdad ? Pero no sé, me gusta documentar ese tipo de fotos.

Así que para la primera página elegí algunas fotos de mí y me decidí a hacer un diseño de cuadrícula de 3x3 con ellas. Pero en lugar de utilizar 9 fotos cogí sólo 6  y rellene los huecos con sellos. Debería haber hecho esto con la técnica del embossing para hacer que resaltara un poco más. Pero hace poco me dieron la herramienta necesaria para hacer eso (otro regalo de cumpleaños), así que no pude probarla en el momento en el que hice esta página, pero lo recordaré para la próxima vez.

Los sellos son de la increíble Lindsay Lettters. Una amiga mía me los compró en Estados Unidos y me los envió a mí aquí en España, ya que no envían internacionalmente. ¡Lástima! Son magníficos y además añadieron un sello extra en el paquete gratis también. ¡Qué suerte la mía! Completé la página con las sobras de los kits de Sugar Rush de Studio Calico y un par de cosas que tenía por ahí como la chapa de madera en forma de estrella o el sello con forma de cámara de Amy Tangerine .

Una vez más he usado principalmente los colores turquesa/aqua dorado/ kraft y color blanco para esta página. Estoy disfrutando mucho de esta combinación de colores en serio. Pero esta vez he decidido añadir un toque de amarillo, rosa y rojo, así para que sea más femenino.

Teniendo en mente la misma idea, las técnicas y la combinación de colores, he creado la segunda página. Hace unos meses creé otro página para chicos (podéis encontrarlo aquí) y como todo el mundo me dijo que les encantó y que a veces puede ser un poco difícil encontrar una página masculino por ahí, he decidido compartir esta.

Así que me decidí a comenzar con esta al igual que empecé la otra vez: con un fondo blanco y negro. No quiero decir que para hacer una página de chicos tienes que usar negro, pero no sé como lo hago que normalmente creo páginas muy coloridos y usar negro es siempre una especie de desafío también para mí que tiendo a usarlo en paginas dedicadas a chicos.

Entonces puse algunas fotos con muecas de mi novio y después de eso añadí nuevamente turquesa/aqua kraft y elementos blancos. Me encanta cómo los vibrantes colores contrastan con la cartulina oscura. También traté de utilizar algunas sobras del kit de marzo de Biscuit Project y de los kits de Sugar Rush, probando diferentes disposiciones hasta que encontré la colocación perfecta para mí.

xoxo

Boo

Mar 20, 2014

Get the most of your Scrapbooking kits (Sugar Rush part 2)

Hello again,

as I promised I am here today to share two more layouts made with the Sugar Rush kits from Studio Calico. Last time I show you some travel related pages. Now it is time to share some celebration pages. As I said previously, I think this reveal was mainly focused on Valentine's day so of course I had to make a page related to this with the main color combo. pink, red and white.

So, this is my page:


If somebody ask me which was my favorite item from the kit I will say the chunky Hearts. They are incredibly pretty!!! I will use them all the time for sure. ;) So for a Valentine's page I couldn't resist using a bunch of them inside a huge die-cut heart. I also added those wood veneer hearts (which were part of the PL kit) as they match perfectly well the other hearts. I love adding some texture to a plain background with repeated stamping. You can always try different patterns and colors and obtain unique backgrounds.


Today's second page documents the other celebrations that we spend together on our trip to Mexico: our birthdays! Yaaaay! We are lucky enough to share the same birthday week (mine is on the 27th and his is on the 25th of February). As I bought the PL kit and I didn't want to left the whole stack of PL cards inside the box, totally unused, I came up with this idea.


That pink cake card was perfect for this project. But as it is a girl-boy page, I tried to add some mint and kraft elements to contrast that pink. But in the end I think that the pinky spots are the most eye-catching. Well, at least I tried ;) That calendar card was the perfect match to this project as well.  I really like the idea of using PL cards on a layout. I have to remember this in the future.


xoxo

Boo

//////////////////////////////////

Hola de nuevo,

como prometí, estoy de vuelta para compartir dos diseños más elaborados con los kits Sugar Rush de Studio Calico. El otro día os enseñe algunas páginas relacionadas con viajar. Hoy es el turno de compartir un par de paginas de celebración. Como mencioné anteriormente, el kit parecía centrarse en el día de San Valentín, así que qué mejor oportunidad para realizar una página acerca de este día y usar por supuesto la  combinación de colores principal del kit: rosa-rojo y blanco.

Esta es mi página:
Si alguien me preguntara cuál ha sido mi elemento preferido del kit diría que los corazones tan monos de plástico. Son increíblemente bonitos, ¿verdad? Me daban ganas de usarlos en todo ;) Así que no pude resistirse a añadir un montón de ellos en el interior de un corazón gigante recortado. Esos corazones de madera eran parte del kit PL y que combinan perfectamente con los otros corazones. Me encanta añadir un poco de textura a un fondo liso con repetidas sellos. Siempre puedes probar diferentes modelos y colores.

La segunda página de hoy documenta las otras celebraciones que hemos tenido durante el viaje  y hemos podido compartir juntos: ¡nuestros cumpleaños! ¡Síii! Tenemos la suerte de compartir la misma semana de cumpleaños (el mío es el 27 y el suyo el 25 de febrero). Ya que compré el kit PL, no quería dejar olvidadas todas las tarjetas del kit asi que se  me ocurrió esta idea.
Esa tarjeta con la tartita y las velas era perfecto para este proyecto. Pero como era muy rosita, muy femenina traté de añadir un poco de turquesa y elementos kraft ya que también era su cumple. Pero al final creo que los rosas ​​siguen resultando lo más llamativo. Bueno, al menos lo intenté ;) Esa tarjeta del calendario fue el complemento perfecto para este página también. Me gusta mucho esta idea de usar tarjetas de PL en un layout. Tengo que recordar esto para páginas futuras. 

xoxo

Boo

Mar 18, 2014

Get the most of your Scrapbooking kits (Sugar Rush part 1)

Hello,
Today I fell pretty excited because I finally got a chance to share with you some of the layouts I made with my Studio Calico Sugar Rush kits. These kits are from February but I couldn't open my box of goodies until last week. Because, as many of you may already know from my Instagram feed, I was on vacation the last days of February. I flew to Mexico DF to meet my boyfriend over there. We had some beautiful days away from our responsibilities, eating junk food, going to the cinema (watching all the Oscars nominee movies and the Lego movie as well hehe), spending some quality time around the city and its historical sites and... being just happy! So now, it's time to document those days :)

About the Sugar Rush kits: I got the main Scrapbooking kit (as subscriber) and the PL main kit because even though I do not do Project Life, the embellishments were so good that I had to get them! Besides, I bought separately some of the items I liked the most from the add-on kits as, for example, the gold alphabet or the vellum stickers.

These are the two first layouts I created with these kits:


I specially love this one! This is truly one of my all time favorite ones. I created it with such a few embellishments that I almost had the entire kits left when I finished it. It is mainly composed of the vellum stickers that was included in one of the add-on kits and the photos. One of the things that I love about Mexico is the beautiful colors of the houses so I wanted to translate that into the layout.


I will probably make a mini album about this trip but for now I just wanted to have it documented through some layouts.
The second layout that I made was inspired by the versatile stamp set that was included in the main Scrapbooking kit. I adore those speak bubbles!!! They are great and fun! On the other hand, I don't know if you remember this kit but when you see it the first colors you see are pink- red and white as it was focused on Valentine's day. So I tried to create a layout with a totally different color combo.

So, I came up with this:


By the photo it is a bit difficult to appreciate the beautiful mint cardstock but I swear it is gorgeous in person. I have been enjoying these color combo a lot lately. I mixed mint/aqua with white and gold/kraft. I love it! Have you ever tried out?


I hope you like them and I'll be back in a couple of days with more Sugar Rush layouts!

xoxo

Boo

//////////////////////////////////

Hola,

Hoy estoy realmente muy emocionada ya que al fin he podido sacar un ratin para compartir con vosotros las páginas que he hecho con los kits Sugar Rush de Studio Calico. Estos kits son de febrero, sin embargo no he tenido oportunidad para abrirlos hasta la semana pasada. Porque, como muchos ya sabréis por mi cuenta de Instagram, he estado de vacaciones los últimos días de febrero. Volé a México DF para encontrarme allí mi novio. Disfrutamos de unos días hermosos lejos de nuestras responsabilidades, comiendo comida basura, yendo al cine (para ver todas las películas nominadas a los Oscars y la peli de Lego por supuesto jeje), caminando en torno a la ciudad y sus lugares de interés histórico y ... siendo simplemente feliz! Pero ahora es el momento de documentar esos días :)

Acerca de los kits Sugar Rush: me hice con el kit principal de Scrapbooking (como subscriptora) y el kit principal PL; porque aunque yo no hago PL, los adornos eran increíbles y los quería para mí! Además, me compré por separado algunos de los artículos que más me gustaron de los add-ons como por ejemplo el alfabeto dorado o las pegatinas de papel cebolla.

Estos son los dos primeros diseños que hice con estos kits :
¡El primero me encanta! Es sin duda una de mis páginas favoritos de todos los tiempos. Lo hice con tan sólo con algunos pocos adornos y al terminarlo casi tenía aun los kits intactos. Esta página se compone principalmente de las etiquetas en vellum que se incluyen en uno de los add-ons y las fotos. Una de las cosas que más me gustó de México es los hermosos colores de las casas. Así que quería traducir eso en el diseño.

Probablemente haré un mini-álbum del viaje, pero por ahora quería tenerlo documentado a través de unas pocas páginas de 12x12.

El segundo diseño que hice está inspirado en el set de sellos tan versátiles que incluye el kit principal de Scrapbooking. ¡Adoro los bocadillos de comic! ¡Son geniales ! Por otro lado, no sé si todavía recordáis este kit, pero cuando lo ves lo primero que te llama la atención son los tonos rosa, rojo y blanco distribuidos por todos los elementos, ya que creo que se centraba en San Valentín. Con esta página traté de crear un diseño con un combo de color totalmente diferente a este tan predominante.
Por la foto es un poco difícil de apreciar el hermoso cartulina de color turquesa pero os juro que es una preciosidad en persona. He estado disfrutando de esta combinación de colores mucho últimamente turquesa con blanco y dorado. ¡Me encanta! ¿Alguna vez la has probado?

¡Espero que os gusten y estaré de vuelta en un par de días con más diseñoshechos con Sugar Rush!

xoxo

Boo

Mar 17, 2014

Happy Adventure (Biscuit Project DT)

(texto en español al final de la entrada)

Hello!


And welcome back for another monthly sketch challenge by Biscuit Project. But first, let's have a look into this month's sketch (see the full post in their website here) and kit. To create this layout I used the Biscuit Project March Scrap Non-stop kit (find it here). This month you can find on their shop two amazing add-ons to complete this kit as well as many new items in their shop. Here you have a peek on their awesome kit and on the sketch.


For this project I decided to give a little twist to the sketch while maintaining essentially the same photo arrangement in relation to the strips of paper on a side of the page. About the color, what most caught my attention of the new collection from Amy Tangerine (Plus One) is the amount of black and white combined with neon colors like pink, yellow, orange and green. 


So I decided to combine the B & W with pink and green. This was the first page I created with this fun collection and I really enjoy working with it! Such cool designs and phrases. Have you spotted that new camera stamp? How pretty is that!


In addition to what it is included in the Non-Stop Scrap kit this month, I added one of the stitched tags and flairs from the same collection that you can buy at the store... if they are not sold out yet. hehe What I love the most about this collection is that the embellishments are perfect for travel or adventure pages.


A little tip if you are tired of the straight cut paper and a good way to highlight a paper design: cut a paper following its special design such as the waves in this pink paper. 


I hope you feel encouraged to give it a try to this sketch!

xoxo

Boo


///////////////////////////


¡Hola!

Y bienvenidos de nuevo a otro desafío mensual de Biscuit Project. Pero primero, vamos a echar un vistazo al boceto de este mes (podéis ver el post completo en su página web aquí) y al kit. Para crear este diseño he utilizado el kit de Marzo Scrap Non-Stop de Biscuit Project (podéis encontrarlo aquí). Además este mes podéis completar este kit con 2 kits adicionales o add-ons, así como muchos productos nuevos en su tienda. 

Para este proyecto que decidí darle un pequeño giro al boceto, manteniendo esencialmente la misma disposición de la foto en relación con las tiras de papel en un lado de la página. Sobre el color, lo que más me llamó la atención de la nueva colección de Amy Tangerine (Plus One) es la cantidad de blanco y negro combinados con colores neón como el rosa , amarillo, naranja y verde.

Así que para esta página decidí combinar el B & W con rosa y verde. Esta ha sido la primera página que he creado con esta colección divertida y me ha encantado trabajar con ella. ¡Menudos diseños y frases tan increíbles! ¿Te has fijado en el nuevo sello con forma de cámara? ¡Qué bonito!

Además de lo que está incluido en el kit Scrap Non- Stop de este mes, he añadido una de las tags  y chapas de la misma colección que podéis adquirir en la tienda... si es que aún no se han agotado. ¿No son increíbles? Lo que más me gusta de esta colección es que los adornos son perfectos para realizar páginas de viaje o de aventura.

Un pequeño consejo, si estás cansada del corte recto del papel y además deseas resaltar el diseño del papel: corta el mismo siguiendo su diseño especial, como las olas en este papel rosa .

¡Espero que os animéis a darle una vuelta a este sketch!

xoxo

Boo

Mar 12, 2014

Here we go (Biscuit Project Design Team Challenge)

(texto en español al final de la entrada)

Hello!

Yes! Biscuit Project is releasing new sections on the blog this month! Have you already check them? One of the new sections is called: I challenge you to... Which means that each design team member can receive with their kit a challenge which they have to complete no matter what it may be. Fun! 


I was very lucky and I received the first challenge of the many who are to come. When I saw the envelope in the box I got all nervous :S ​​Would it be something easy or a real headache? But luckily I got an easy challenge: create a project using only one paper from the kit. So, no papers piled behind the photo, neither using strips of paper around the edges. 


So, looking though the kit papers I found a paper more or less divided on half with a super designed side and the other one blank. Perfect! After that I used as a good girl just embellishments and stamps or ink splatters. 


I mainly chose to use rubb-ons because once you start using them you can not stop! Besides, they help me to translate everything that was going through my head while waiting for the flight to begin my vacation away from home. 


What about you? Wanna join this challenge?
xoxo

Boo

//////////////////////////////

¡Hola!

¡Sí! Biscuit proyecto esta de presentación de nuevas secciones en el blog este mes ¿Ya las habéis visto? Una de las nuevas secciones se llama: Te reto a... Lo que significa que cada miembro del equipo de diseño puede recibir con su kit un reto que tienen que completar sin importar lo que sea. ¡ Qué divertido!

Tuve mucha suerte y he recibido el primer desafío de los muchos que están por venir. Cuando vi el sobre en la caja me puse toda nerviosa : S ¿Sería algo fácil o un verdadero dolor de cabeza ? Pero por suerte me tocó un reto fácil : crear un proyecto utilizando un solo papel del kit. Así que nada de poner papeles apilados detrás de la foto, ni de usar tiras de papel alrededor de los bordes.

Así  que buscando entre los papeles del kit encontré un papel más o menos dividido por la mitad con un lado muy diseñado y el otro en blanco. ¡Perfecto! Después me porté como una buena chica y sólo he empleado adornos y sellos o salpicaduras de tinta para completar la página.

Elegí principalmente utilizar Rubb-ons o calcomanias ya que una vez que empiezas a usarlas ¡no se puede parar! Además me ayudaron a plasmar todo lo que pasaba por mi cabeza mientras esperaba al vuelo para comenzar mis vacaciones lejos de casa. 

Y tu, ¿te atreves con el reto?

xoxo

Boo